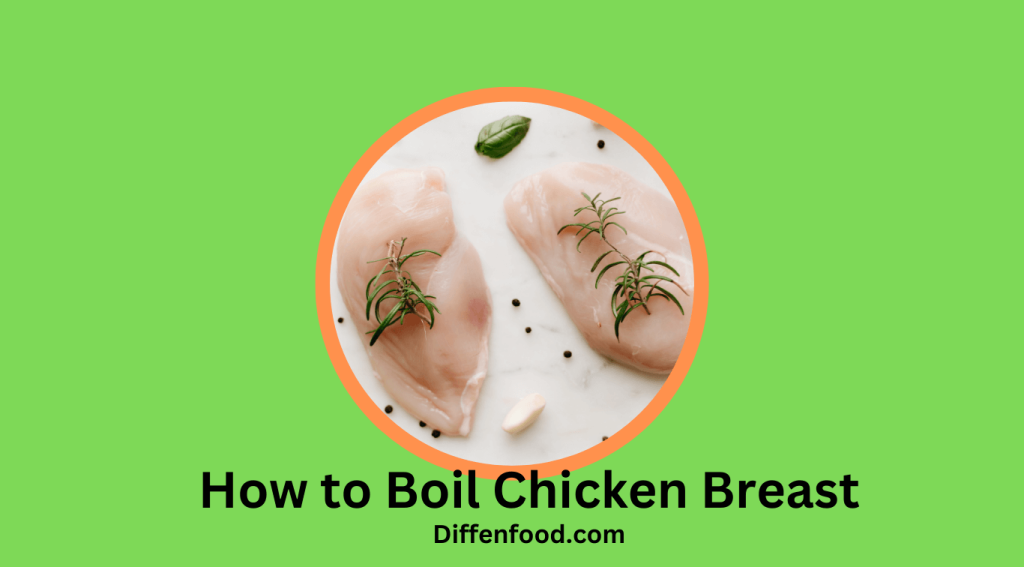
Welcome to our comprehensive guide on how to boil chicken breast to perfection. Boiling chicken breast is a fundamental cooking technique that yields juicy, tender, and versatile meat, perfect for a wide range of dishes. Whether you’re a novice in the kitchen or an experienced home cook looking to expand your culinary repertoire, this step-by-step tutorial will equip you with the skills to create delicious meals with boiled chicken breast as the star ingredient. Get ready to elevate your cooking game and impress your family and friends!
- The Benefits of Boiling Chicken Breast
- Choosing the Perfect Chicken Breast
- Necessary Equipment
- Preparing the Chicken Breast
- Boiling the Chicken Breast
- Cooking Time and Temperature
- Testing for Doneness
- Resting and Shredding the Chicken Breast
- Flavor Enhancements and Storage
- Recipe Ideas and Conclusion
- Conclusion
The Benefits of Boiling Chicken Breast
Boiling chicken breast offers several advantages over other cooking methods. Firstly, it is a healthier alternative as boiling retains the natural flavors of the meat without adding excessive fats or oils. Secondly, the gentle simmering process ensures the chicken remains tender and succulent. Lastly, boiling allows for maximum versatility, as the plain flavor of boiled chicken breast can be easily enhanced with marinades, seasonings, or used as a base for soups, salads, sandwiches, and more.
Choosing the Perfect Chicken Breast
To achieve the best results, start with high-quality chicken breast. Look for fresh, boneless, skinless chicken breasts at your local butcher or grocery store. Opting for organic or free-range chicken is ideal, as it tends to have superior taste and texture. When selecting chicken breast, aim for uniform thickness to ensure even cooking.
Necessary Equipment
Before diving into the boiling process, gather the necessary equipment to ensure a smooth cooking experience. Here’s what you’ll need:
Large pot: Choose a pot that comfortably accommodates the chicken breast without overcrowding. A 4- to 6-quart pot should work well for most recipes.
Tongs or slotted spoon: These tools will help you handle the chicken breast safely and efficiently.
Instant-read thermometer: Essential for checking the chicken’s internal temperature to ensure it reaches the safe minimum.
Cutting board and knife: You may need to trim excess fat or slice the chicken breast after boiling.
Preparing the Chicken Breast
Before placing the chicken breast in the pot, it’s important to prepare it properly. Follow these steps for optimal results:
Rinse the chicken breast under cold running water to remove any debris. Pat it dry with paper towels.
Trim any visible fat or unwanted parts from the chicken breast using a sharp knife.
If desired, season the chicken breast with salt, pepper, or other spices to add flavor. Keep in mind that additional seasonings can be added later, so a simple seasoning at this stage will suffice.
Boiling the Chicken Breast
Now that your chicken breast is prepped, it’s time to start boiling! Follow these steps to ensure the chicken is perfectly cooked:
Fill a large pot with enough water to fully submerge the chicken breast, leaving a few inches of space at the top to avoid overflow.
Place the pot on the stovetop over medium-high heat and bring the water to a gentle boil.
Once the water reaches a rolling boil, carefully add the chicken breast to the pot using tongs or a slotted spoon. Ensure the chicken is fully submerged.
Cooking Time and Temperature
Achieving the ideal cooking time and temperature is crucial for a perfectly boiled chicken breast. Follow these guidelines to ensure optimal results:
Reduce the heat to medium-low, maintaining a gentle simmer rather than a vigorous boil. This will prevent the chicken from becoming tough.
Cover the pot with a lid to retain heat and cook the chicken breast evenly.
Let the chicken breast simmer for approximately 15 to 20 minutes. The exact cooking time may vary depending on the size and thickness of the chicken breast. To ensure that the chicken is cooked thoroughly, use an instant-read thermometer to check its internal temperature. The chicken breast should reach a minimum internal temperature of 165°F (74°C).
Testing for Doneness
To determine if the chicken breast is fully cooked, follow these steps:
Carefully remove the chicken breast from the pot using tongs or a slotted spoon.
Insert the instant-read thermometer into the thickest part of the chicken breast, making sure not to touch the bone if there is any.
If the temperature reads 165°F (74°C) or higher, the chicken breast is ready. If it’s below the safe minimum temperature, return it to the pot and continue simmering for a few more minutes before retesting.
Resting and Shredding the Chicken Breast
Once the chicken breast has reached the desired temperature, it’s essential to let it rest for a few minutes before slicing or shredding. Resting allows the juices to redistribute, resulting in a more flavorful and tender chicken breast. Follow these steps to rest and prepare the chicken breast:
Transfer the cooked chicken breast to a clean cutting board and cover it loosely with aluminum foil. Let it rest for about 5 minutes.
After resting, use a sharp knife to slice the chicken breast into thin, uniform pieces. Alternatively, you can use two forks to shred the chicken for recipes like salads or sandwiches.
Flavor Enhancements and Storage
Boiled chicken breast serves as a blank canvas that can be easily customized with various flavors. Here are a few ways to enhance the taste of your boiled chicken breast:
- Seasonings: Add herbs, spices, or seasoning blends like garlic powder, onion powder, paprika, or Italian seasoning to infuse the chicken breast with additional flavors.
- Marinades: Before boiling, marinate the chicken breast in a mixture of oil, vinegar, herbs, and spices for a more pronounced taste.
- Sauces and dressings: Top your boiled chicken breast with sauces or dressings like barbecue sauce, teriyaki sauce, or homemade vinaigrettes to add a burst of flavor.
When it comes to storage, you can keep boiled chicken breast in an airtight container in the refrigerator for up to 3 to 4 days. If you have leftovers, consider incorporating them into recipes like chicken salad, pasta dishes, or casseroles for a quick and convenient meal.
Recipe Ideas and Conclusion
Now that you’ve mastered the art of boiling chicken breast, it’s time to put your newfound skills to use! Here are a few recipe ideas to get you started:
- Chicken Caesar Salad: Toss thinly sliced boiled chicken breast with crisp romaine lettuce, Parmesan cheese, croutons, and Caesar dressing for a classic and satisfying salad.
- Chicken Noodle Soup: Create a comforting bowl of chicken noodle soup by adding shredded boiled chicken breast, vegetables, and noodles to a flavorful broth.
- Chicken Wraps or Sandwiches: Layer sliced boiled chicken breast with fresh vegetables, spreads, and condiments in a wrap or sandwich for a quick and nutritious meal on the go.
Conclusion
| Step | Instructions |
|---|---|
| 1 | Rinse the chicken breast under cold running water and pat dry. |
| 2 | Trim any visible fat or unwanted parts from the chicken breast. |
| 3 | Season the chicken breast with salt, pepper, or other desired spices. |
| 4 | Fill a large pot with enough water to fully submerge the chicken breast, leaving some space at the top. |
| 5 | Place the pot on the stovetop over medium-high heat and bring the water to a gentle boil. |
| 6 | Carefully add the chicken breast to the pot, ensuring it is fully submerged. |
| 7 | Reduce the heat to medium-low, cover the pot, and let the chicken simmer for 15-20 minutes. |
| 8 | Check the internal temperature of the chicken breast with an instant-read thermometer. |
| 9 | Once the chicken reaches 165°F (74°C), remove it from the pot and let it rest for 5 minutes. |
| 10 | Slice or shred the chicken breast as desired. |
Boiling chicken breast is a versatile and accessible cooking technique that allows you to create delicious and healthy meals. By following the step-by-step instructions in this guide, you’ll achieve tender, flavorful results every time.
How to Make Homemade Chili: Easy & Delicious Recipe
How To Make Homemade Ice Cream: A Step-By-Step Guide